VPN Setup - Multi-Factor Authentication (MFA) - iOS & Android

National Taiwan Ocean University | VPN6 Mobile Setup Guide

VPN6 Setup for Phones and Tablets

First-time setup takes about 5–10 minutes. Follow the steps below; for future connections, you only need to open two apps.

For iPhone / iPadFor AndroidMFA one-time code required

Review the steps before starting

Complete 5 steps for first-time setup

  1. 1Install apps
  2. 2Enable MFA (multifactor authentication)
  3. 3Download configuration
  4. 4Import into OpenVPN
  5. 5Connect to VPN

Choose your device first

Which device are you using?

✓Selected device: iPhone / iPad

Follow the steps in order

Start first-time setup

1

Install both apps first

You will need both apps. Install both before continuing.

iPhone / iPad selected: tap an app below to install it from the App Store
OpenVPN Connect app icon

OpenVPN Connect

Imports the configuration file and connects to VPN.
Developer: OpenVPN Inc.

Google Authenticator app icon

Google Authenticator

Generates the 6-digit one-time code needed to log in to VPN.
Developer: Google

Step 1 is complete when both apps are installed.

Continue to Step 2 to enable MFA one-time codes.
2

First use: enable MFA (multifactor authentication)

Display the QR code on your computer, then scan it with your phone.

Before you start, check that:

You have applied for VPN service through the Academic Information System and have a computer and your phone or tablet ready.

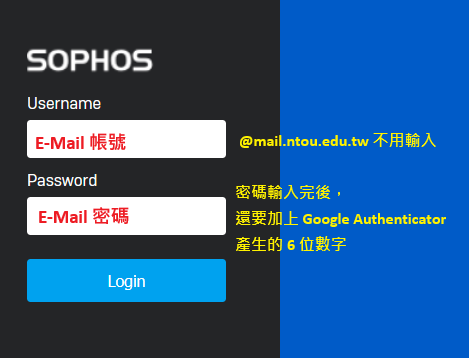
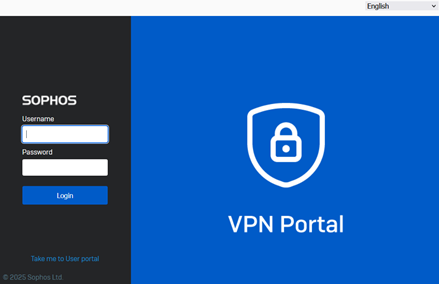
On your computer: open VPN6 Portal and log in with your university @mail email username and password, not your Google @email credentials.

VPN6 Portal login screen
Log in to VPN6 Portal on your computer

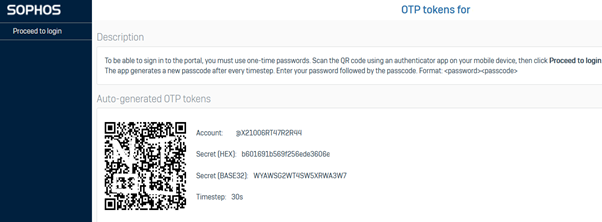
After your first successful login, a QR code appears on your computer. If it does not appear, try another browser.

VPN6 Portal QR code screen
A QR code appears on your first login

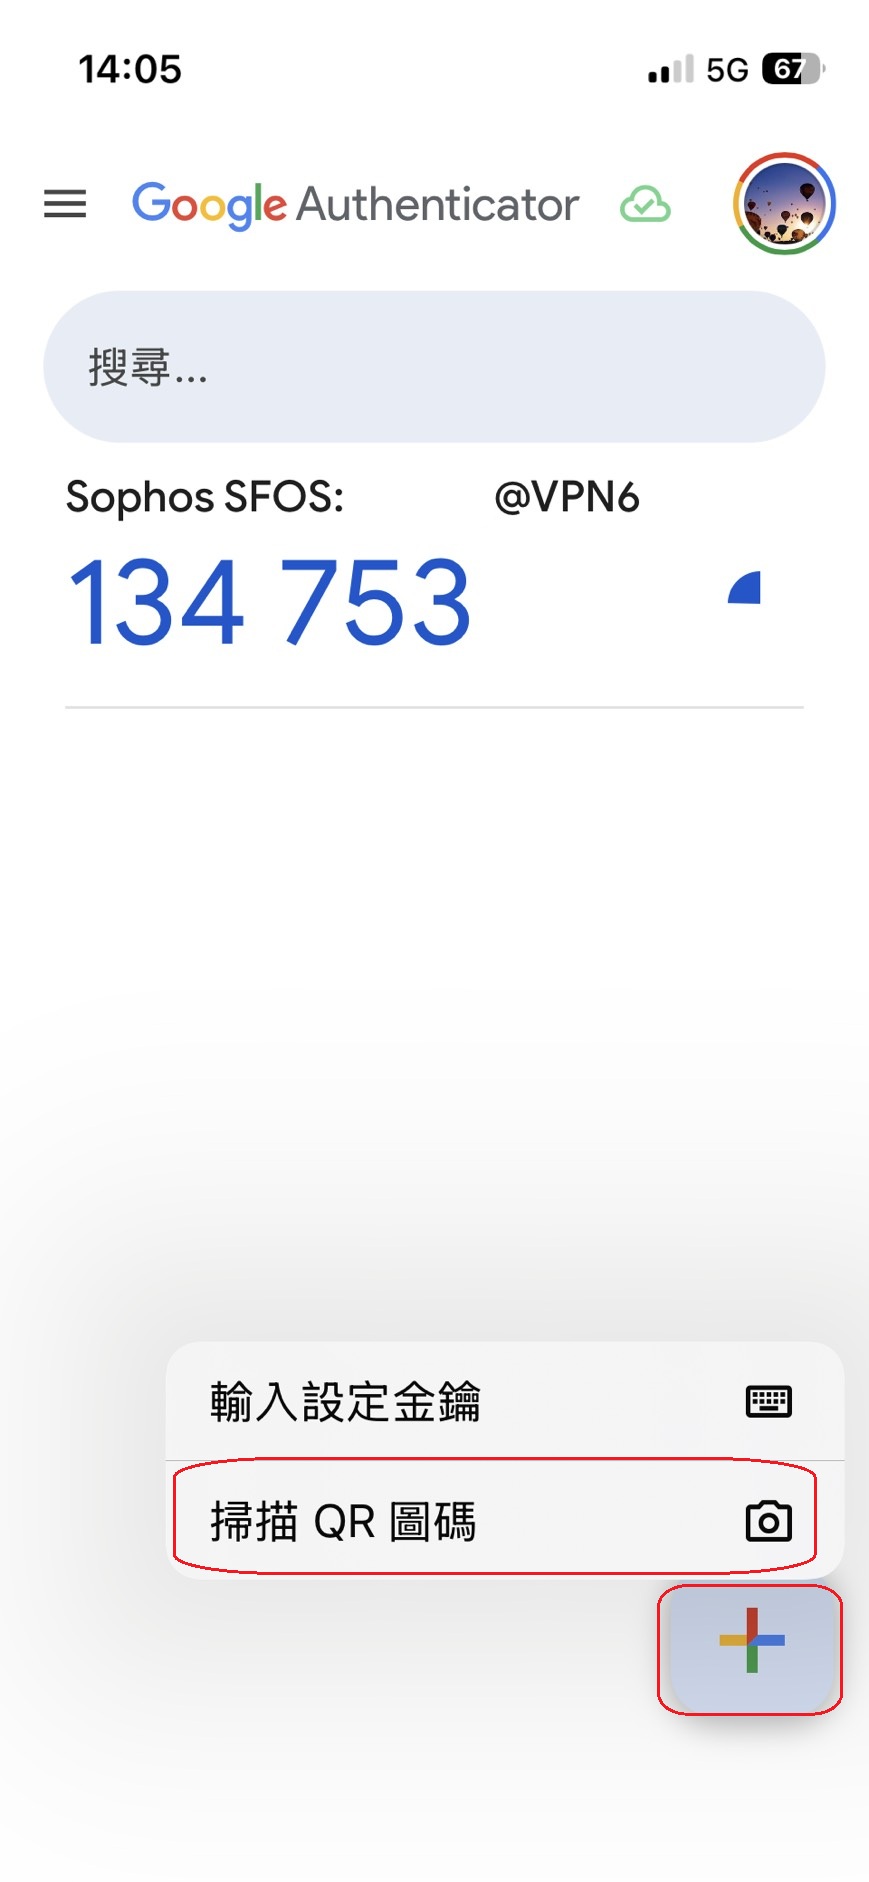
On your phone: Open Google Authenticator; no registration is required. Tap +, then select Scan a QR code.

Google Authenticator QR code scanning screen
Tap +, then select Scan a QR code

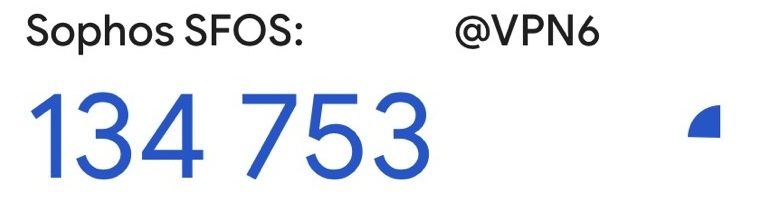
When you see Sophos SFOS and a 6-digit code, MFA (multifactor authentication) is enabled.

Google Authenticator displaying the Sophos SFOS 6-digit code
Setup is complete when Sophos SFOS and a 6-digit code appear
Keep the Sophos SFOS entry. Do not delete it.

The verification code refreshes every 30 seconds. You will need it each time you log in to VPN.

3

Log in to VPN6 Portal again and download your personal configuration

The password format for the second login differs from the first.

For this login, append the 6-digit one-time code directly to your password.
Email password: ntouvpn+Verification code: 654321=ntouvpn654321

Do not insert spaces. If the code is about to expire, wait for the next code before logging in.

Open VPN6 Portal again. Use the same username. Enter your email password followed by the current 6-digit code.

Complete password example for the second VPN6 Portal login
Second login: append the 6-digit one-time code directly to your email password

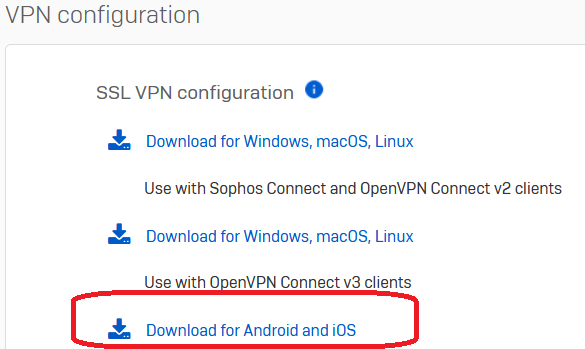
Find SSL VPN Configuration and select Download for Android and iOS.

Downloading SSL VPN Configuration for Android and iOS
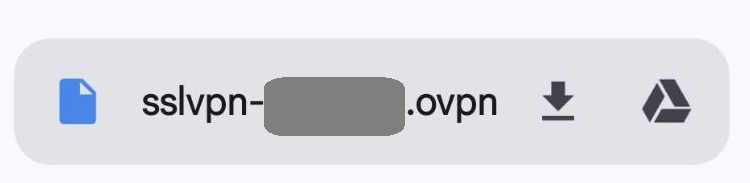
Download your personal configuration file (config / ovpn)
This configuration file is personal. Do not share it with others.

If you download it on your computer, transfer it to your mobile device using your own email, AirDrop or Quick Share.

4

Import the configuration into OpenVPN Connect

The instructions below vary for iOS and Android.

Choose your device to show its instructions

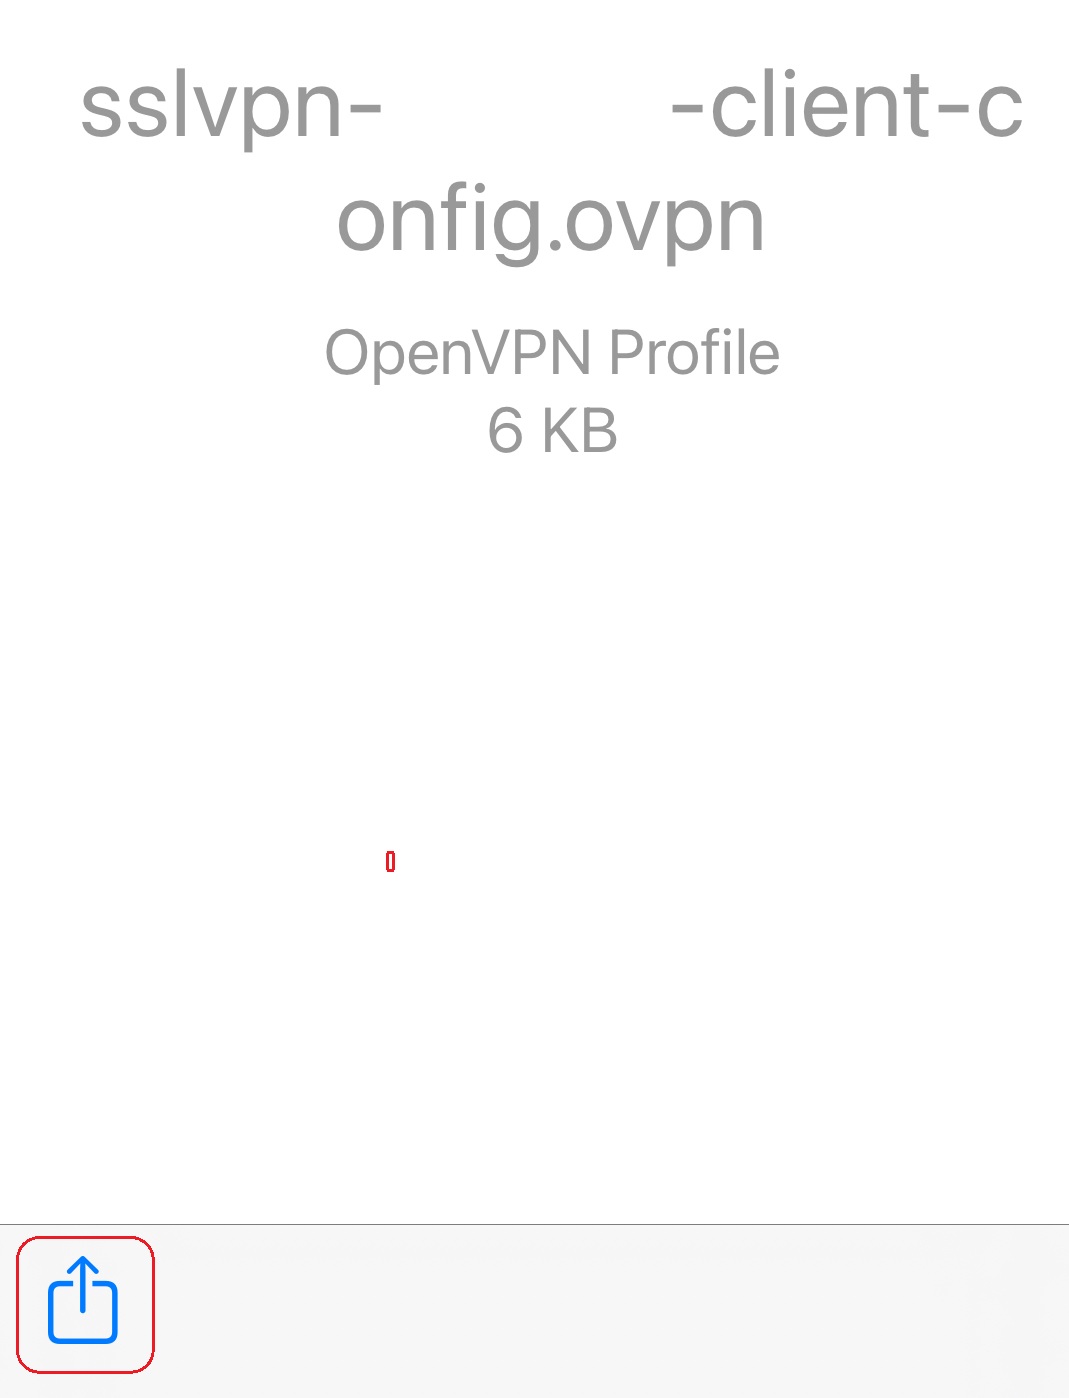
Open the downloaded config / ovpn file in Mail or Files, then tap Share.

Sharing the configuration file on iOS
Tap the Share button

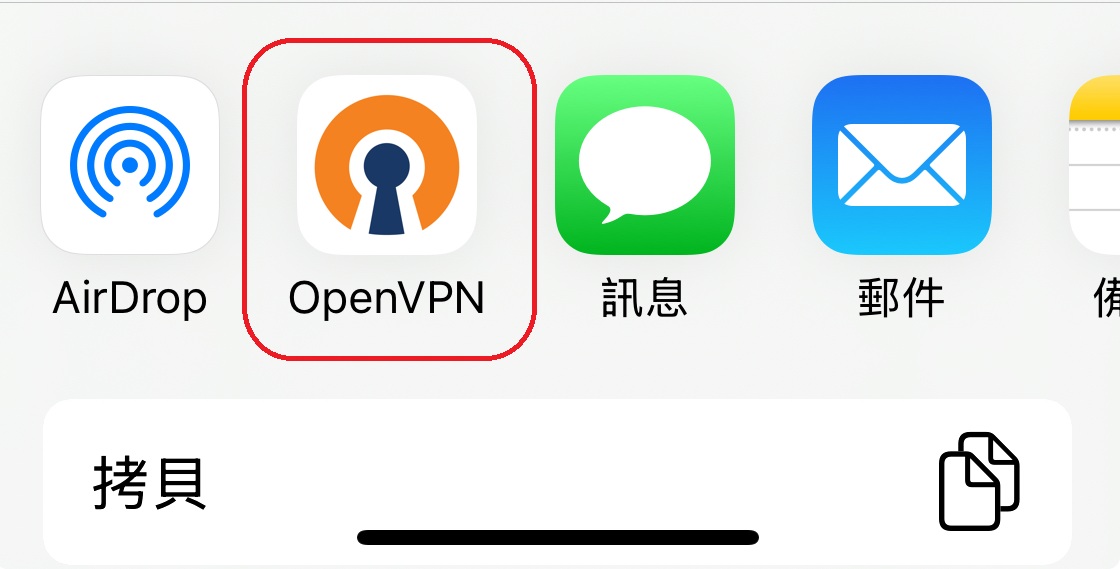
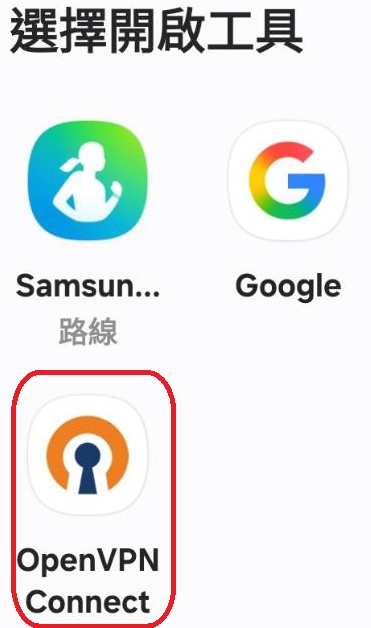
Select OpenVPN or Copy to OpenVPN.

Selecting OpenVPN on iOS
Select OpenVPN

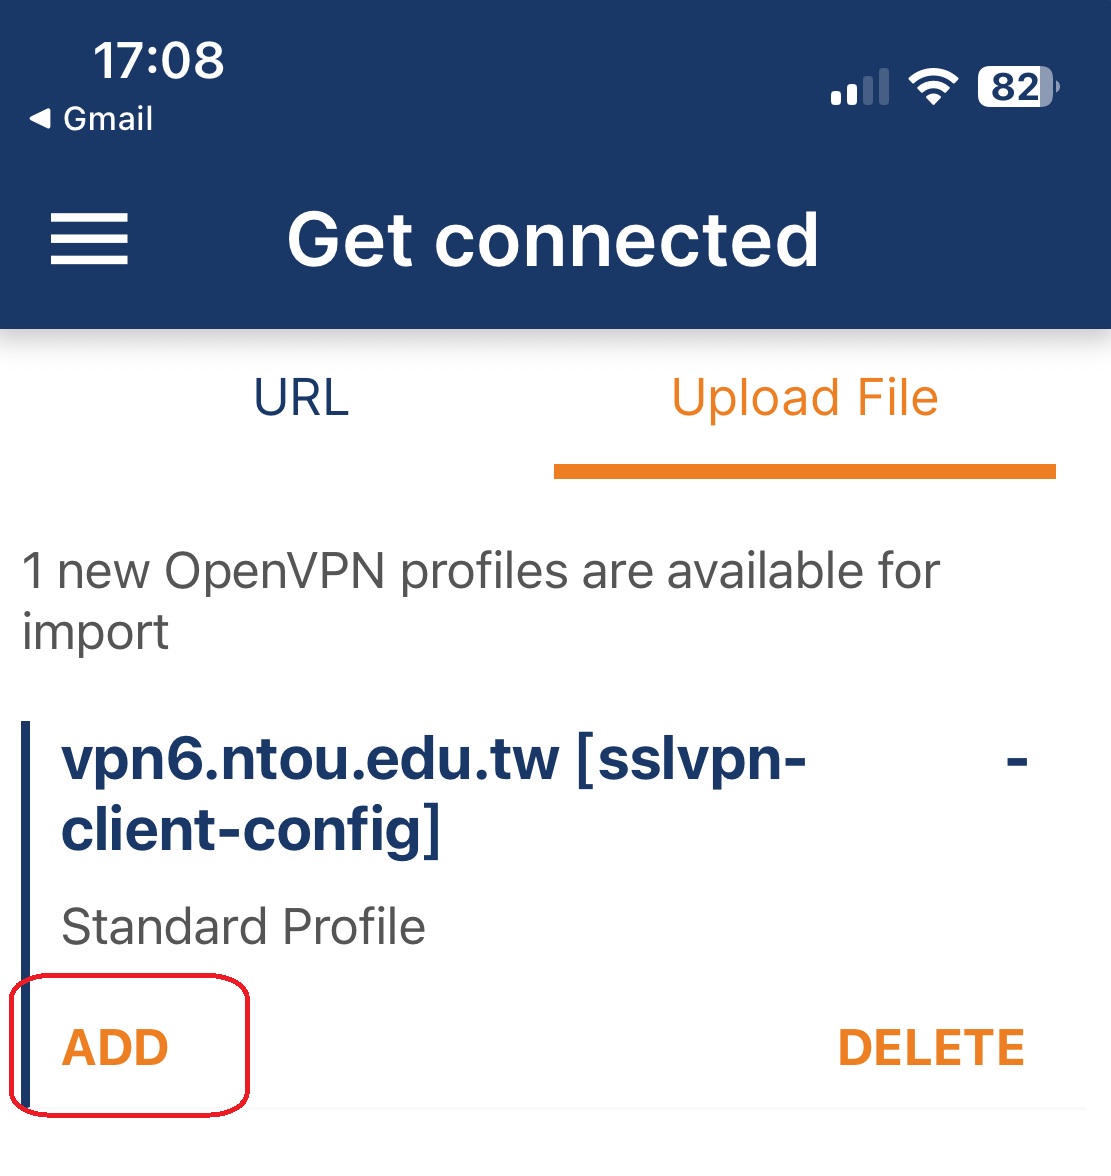
When OpenVPN Connect opens, tap ADD.

Tapping ADD to import the configuration in OpenVPN Connect
Tap ADD to complete the import
5

Connect for the first time

Use your Student ID or faculty/staff username. The password must still include the 6-digit code.

Open Google Authenticator, find Sophos SFOS and check the current 6-digit verification code.

Google Authenticator 6-digit one-time code
Note the current 6-digit one-time code

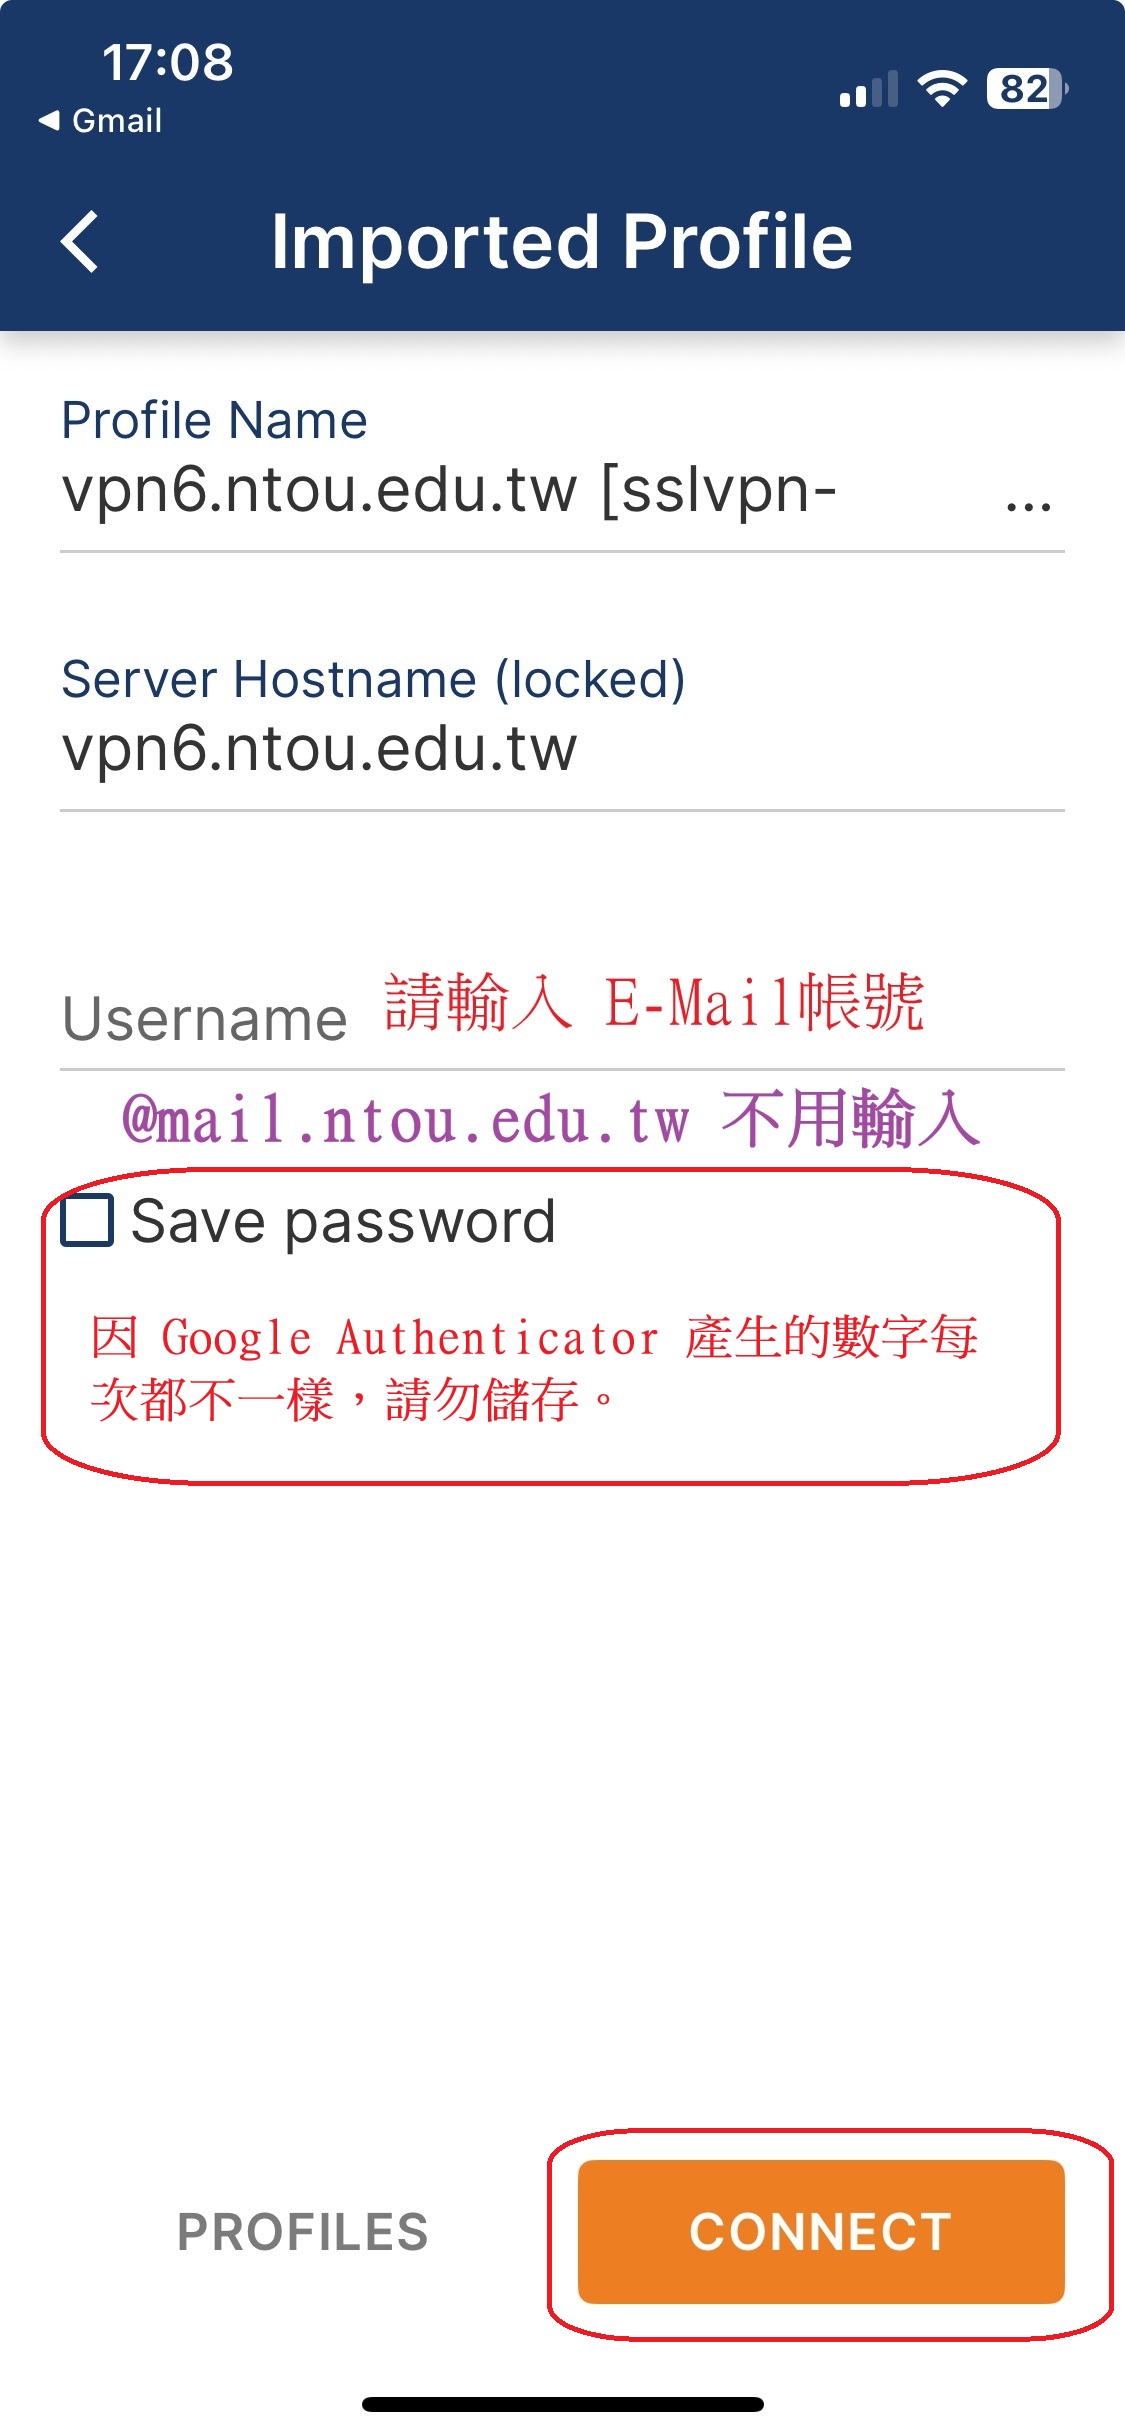
Return to OpenVPN Connect, enter your Student ID or faculty/staff username and tap CONNECT.

Entering the username and tapping CONNECT in OpenVPN Connect
Enter your username and tap CONNECT

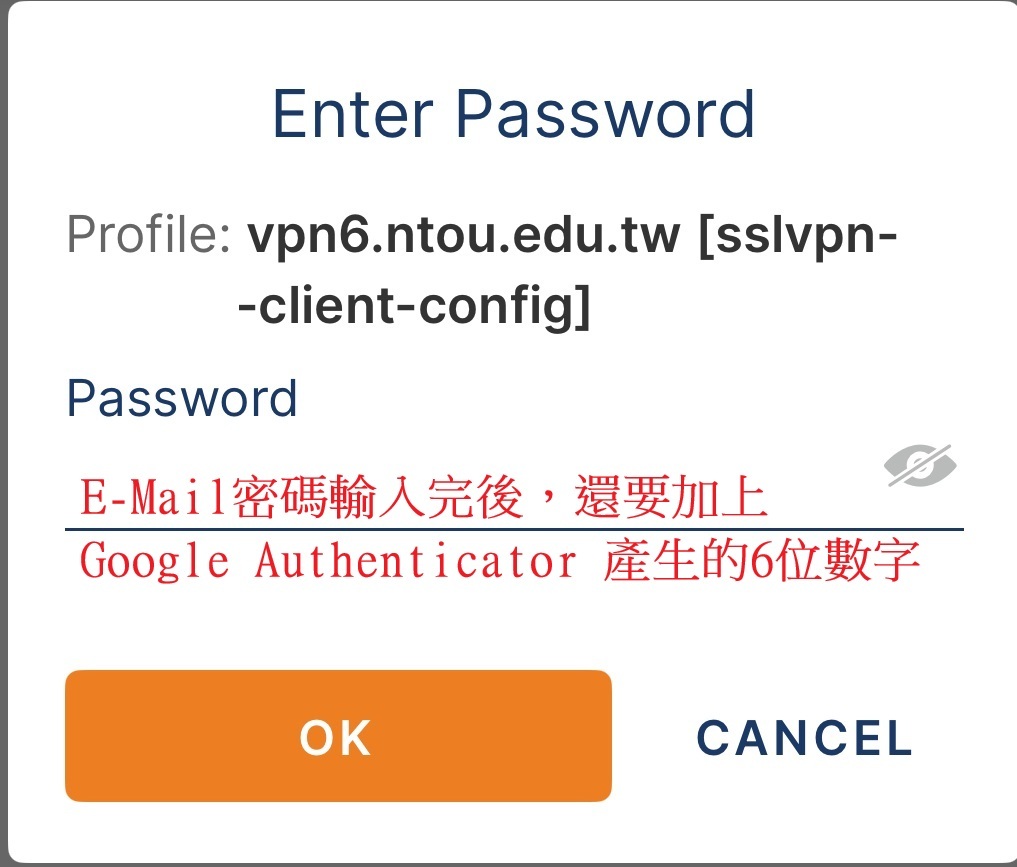
Enter your email password followed by the current 6-digit verification code, with no spaces.

Entering the complete password in OpenVPN Connect
Enter your email password followed by the 6-digit code

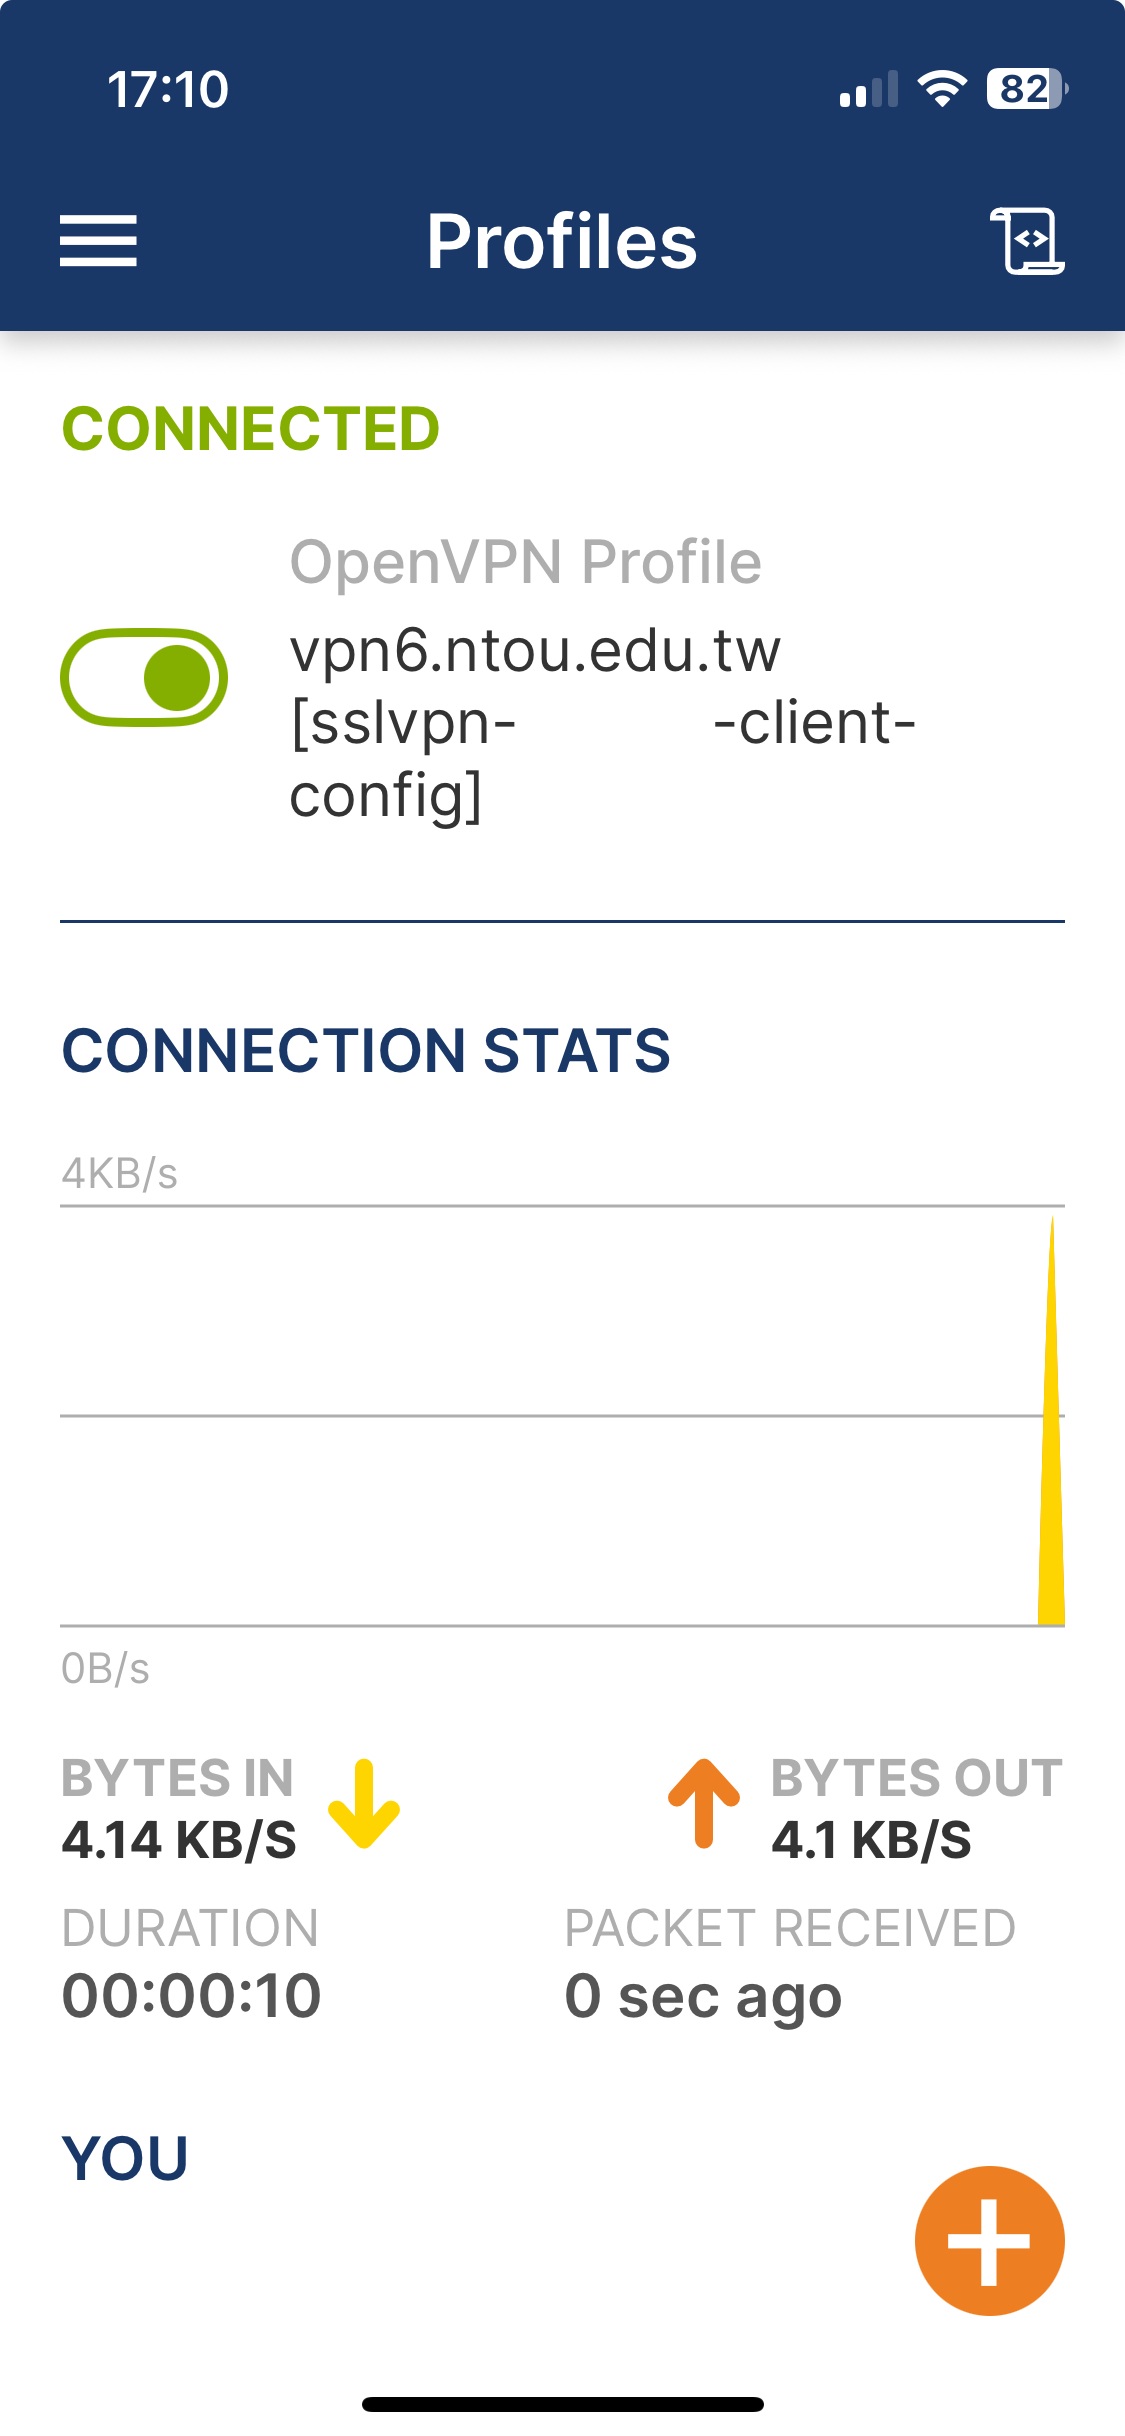
When the screen shows Connected, your VPN is connected.

OpenVPN Connect successful connection screen
Connected indicates that the VPN connection is established

You can also check your current IP address. An address in the 140.121.6.* range indicates that you are connected through the NTOU VPN.