Jump to the main content block
:::
:::

VPN6 Setup - Multi-Factor Authentication (MFA) Mechanism - Windows

Windows Setup Guide

VPN6 Setup Journey

Follow the route step by step. Each step indicates whether to use your computer, browser or phone.

⏱ About 10–15 minutes💻 Have your Windows computer ready📱 Have your phone ready
⚠️ Apply for VPN service before your first setup

Apply through the Academic Information System before logging in to the VPN Portal. The service is activated immediately upon application.

🏫Open Academic Information System
01
💻 Windows computer

Install Sophos Connect

First, install the VPN6 client on your computer.

Download the installer, select the checkbox to accept the terms and click Install. Launch Sophos Connect when installation is complete.

Windows installer (Sophos Connect 2.5.1)
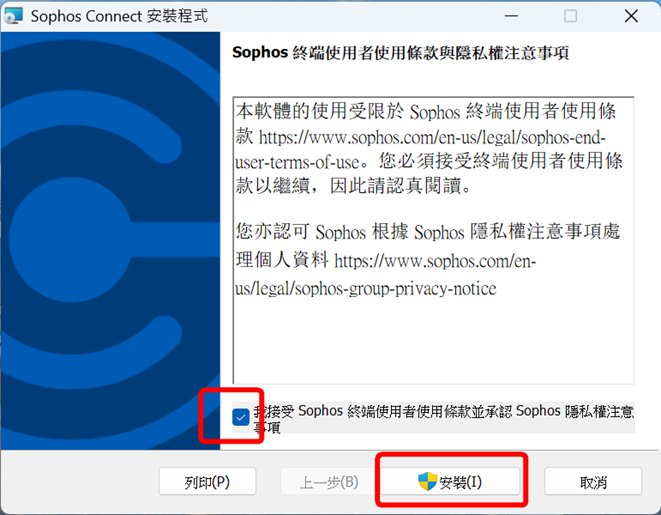
Sophos Connect installation screen
Install Sophos Connect (choose Yes when Windows asks whether to allow changes)
✓ Done when: Sophos Connect opens successfully on Windows.
02
🌐 Browser

Log in to VPN Portal for the first time

Use your university account to activate your VPN6 setup.

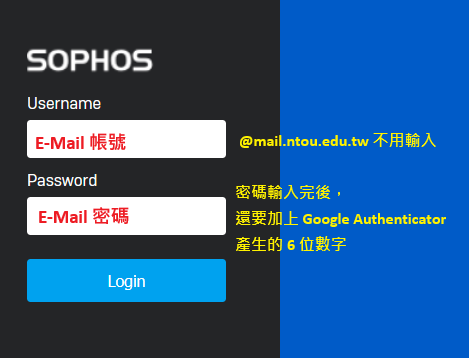
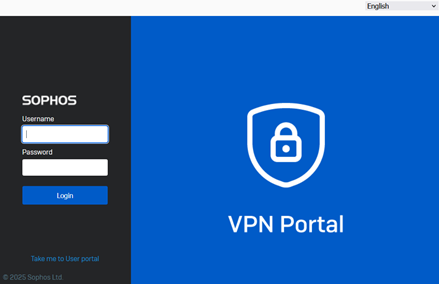
Log in with your university email account (use a computer to open the portal so you can scan the QR code with your phone).

VPN Portal login screen
Note: do not include @mail.ntou.edu.tw in your username
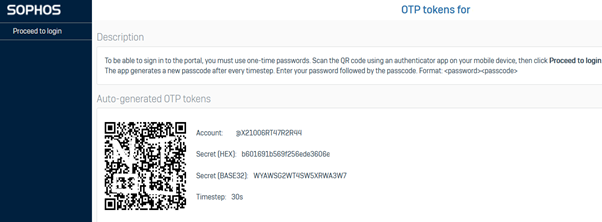
VPN Portal displaying the QR code

A QR code appears after login

If no QR code appears after login, try another browser.

Note: after scanning, click Proceed to login in the upper-left corner

✓ Done when: The Google Authenticator QR code appears on the screen.
03
📱 Now pick up your phone

Set up Google Authenticator

Use your phone to scan the QR code on the VPN Portal screen.

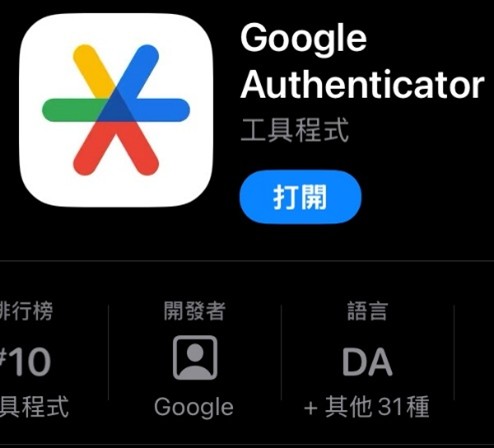
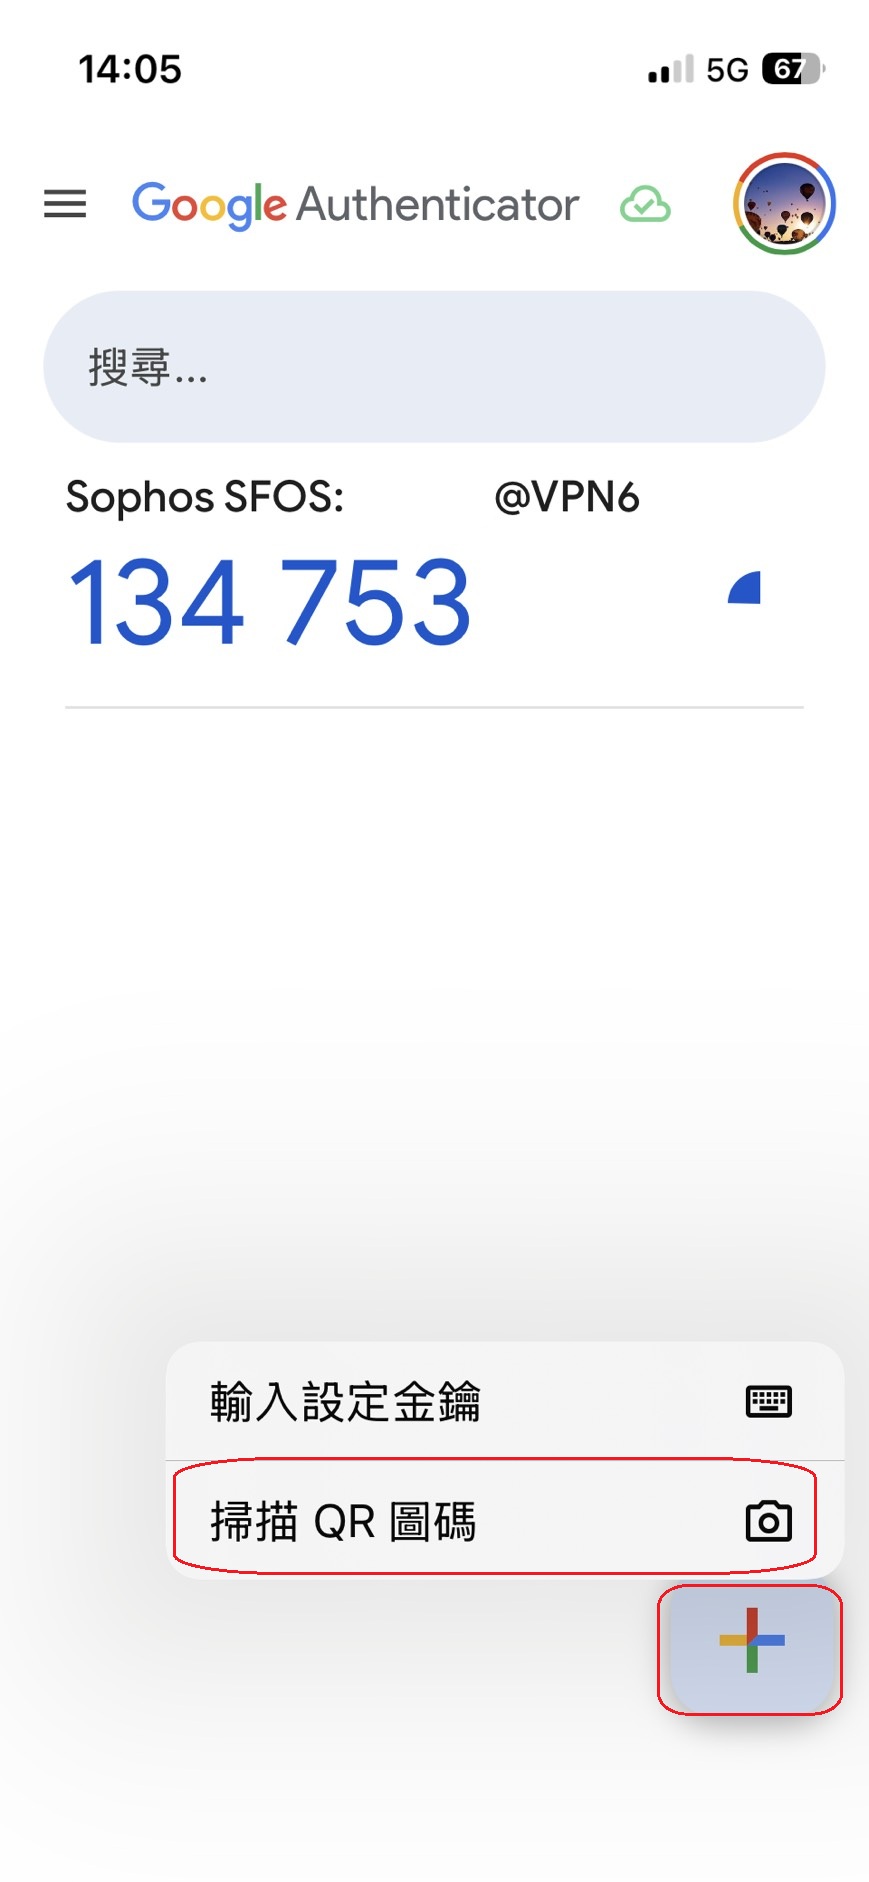
Install Google Authenticator (developed by Google). Open it, tap + and select Scan a QR code.

Google Authenticator app
Check that you installed Authenticator developed by Google
Scanning a QR code in Google Authenticator
Tap +, then select Scan a QR code
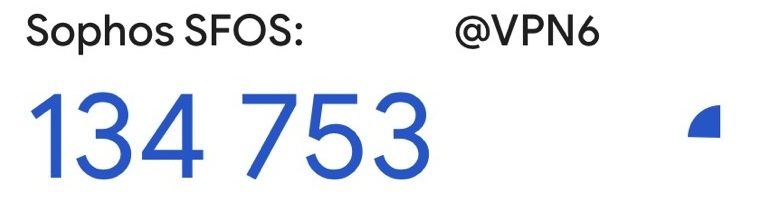
Google Authenticator displaying the VPN6 6-digit code

After scanning successfully, a 6-digit code appears. It refreshes every 30 seconds.

Do not delete the Sophos SFOS: username@VPN6 entry. You will need it each time you connect.
✓ Done when: Your phone displays Sophos SFOS: username@VPN6 and a 6-digit verification code.
04
🌐 Return to your computer browser

Download your personal VPN configuration

Log in to the Portal again to obtain your personal SSL VPN Configuration.

For this login, append the 6-digit verification code directly to your email password.

Email password+Current 6-digit code→EmailPassword123456
Password format for the second VPN Portal login
Second login: append the 6-digit code to your email password
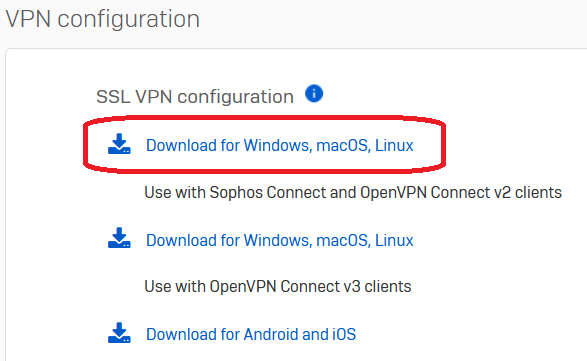
Download SSL VPN Configuration
Download your personal SSL VPN Configuration file
Do not insert spaces between your password and the 6-digit code. The code refreshes regularly; use the numbers currently shown on your phone.
✓ Done when: Your personal VPN6 configuration file has been downloaded to your computer.
05
💻 Windows computer

Import into Sophos Connect

Add the configuration file you just downloaded to the VPN client.

Double-click the downloaded configuration file. Sophos Connect will automatically import the VPN6 connection.

Importing the VPN6 configuration into Sophos Connect
After import, Sophos Connect displays VPN6
✓ Done when: The VPN6 connection appears in Sophos Connect.
06
💻 Windows computer

Connect to VPN6

Setup is complete. Start from this step for future VPN connections.

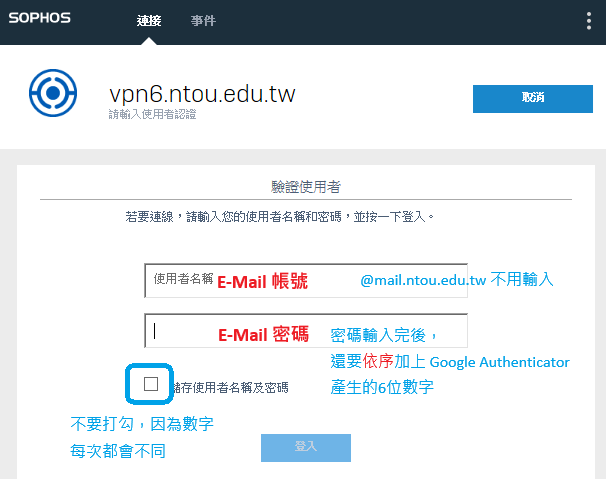
Click Connect. Enter your username and your email password followed by the current 6-digit code.

Username: Student ID / usernamePassword: email password + 6-digit code
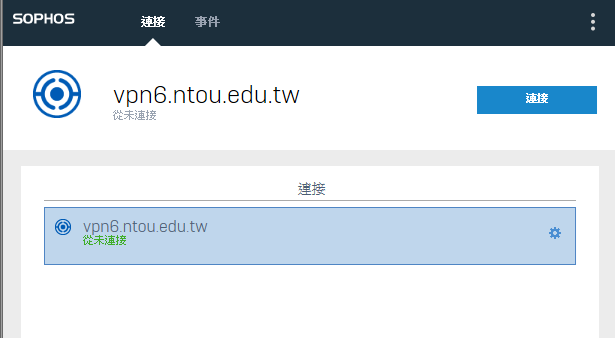
Clicking Connect in Sophos Connect
Click Connect on the VPN6 connection card
Sophos Connect username and password screen
Enter your username and email password followed by the 6-digit code
Successful VPN6 connection in Sophos Connect
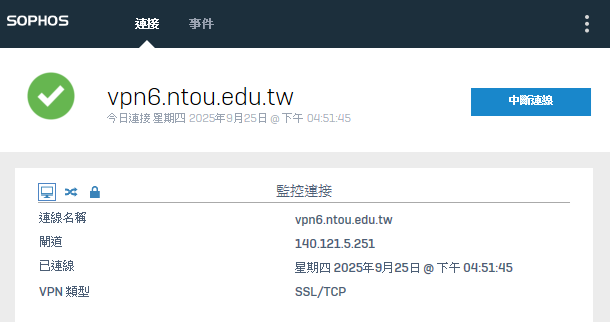
When the status shows Connected, VPN6 is connected
🎉 Connected! You can now access resources restricted to the campus network.

Common setup problems

If the connection fails, check these three things first.

Username format

Enter only "Student ID / username". Do not include the email domain.

Password format

Append the 6-digit verification code directly to your email password, with no spaces.

Expired verification code

Use the 6-digit code currently displayed on your phone. Once it refreshes, the previous code is no longer valid.

Click Num:
Login Success